Showing posts with label blogging tips. Show all posts

Sunday, November 11, 2012


For a long time I have been wondering and thinking of how I can remove the Navbar of my blog, and after making some research, I thank God I can find solution to it.

Did you want to remove the Navbar on your blog? Are you tired with the Navbar?
If yes is answer to any of the above question, guess what, the solution is here.
Follow this simple step and you will never regret, because there is no need to touch your template. 
Please note: make sure you are using the new blogger interface to follow up with this tutorial easily

Step 1. Login to your dashboard, go to layout, you will be provided with something like this
Click on the edit Navbar as you can see in the picture, and you will be taken to this page
Just click on the off button and you save the settings.
Preview your blog, and you will see nothing like Navbar in it again. Hope this tutorial work out for you, if yes show your appreciation with the comment box bellow, and don’t forget to click on the share button for your people who might have interest on it to see it. Also don’t forget to include your Email to get update as soon as possible. you may also like to compare blogger with worpress
post signature

Wednesday, October 31, 2012

There are many blogging platform out there which each of them serve the same purpose but with different outlook. Today am sharing my main motive of using blogger.com as my platform. Here are the main reasons why I choose it as my platform

==> It is free to use; I choose blogger.com as my platform because it is free to use, even without buying domain, you can still blog, once you have passion for blogging.

==> It can be monetize even without buying domain for it; easily without any doubt, you can monetize the traffic of your blog even without buying domain for it, so many people are out there are still using .blogspot.com, and they are still able to monetize there blog for the traffic they receive every day.

==> Unlike wordpress.com, you don’t need to install plug-in before you can edit or change the outlook of your blog; it is not new to people using wordpress.com as there platform that they will need to install some plug-in before they can edit some part of their outlook. But this is not applicable to those using blogger.com as there platform, because you can edit, backup/restore your template without the installation of any plug-in.

==> Blogger.com is own by google; because of the fact that blogger.com is own by google, one can relax and feel free of using it, because it is very difficult to hack google, due to expert in the area. If someone is telling you that he can hack google, just tell such person that you can guarantee him that he will never succeed doing so. However, make sure you keep your login detail safe, because this is what the hacker can use to have access to your dashboard and have control over it. Google will not be responsible for keeping your password in a lesser safe place, e.g keeping it on your phone. Please note; never use your email and password in another place different from blogging platform, if you sign up in another place different from what is related to google, your login detail can easily be copied from such place e.g forum. Therefore, it will be of help to have another email or gmail to use in forums.
Which platform did you prefer most? Did you have anything similar to this or different from this? If you have any other thing you would like to say, kindly relay your comment in the comment box. post signature

Sunday, October 28, 2012

With this tutorial today, we will all know how to add 'you might also like' to blog post. To do this, it only involves some easy steps. Why adding you might also like to blog post? With you might also like on your post, it will keep the visitor busy on your blog, and as well as generating more traffic on it. It is also a great way for people to see previous post which he doesn’t even think he can get on your blog. This is how it will look like after have finished!
How can i do this? Visit the link below www.linkwithin.com/learn you will see something similar to this page
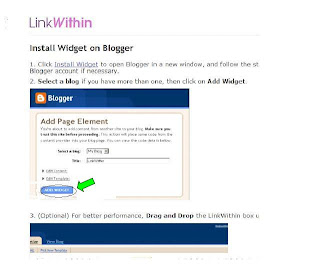
Fill your email, the blog link and the platform E.G Blogger, for the Width, I use the default, that is 3 stories, then click on Get Widget, it will now take to another page like this
just follow the simple instruction and you will have you might also like at the end of every post you make. Have you tried this and it works for you? Are you using something similar on your blog? Kindly relay your comment.
Today, we shall be focusing on how to add signature to blog post. Adding signature to blog post comprise of three easy steps, just follow up with this tutorial and at the end or before your post, you will see the signature(image) that you prefer most.
After you have created your desire image, make sure you save it as png in order not have a white box in your signature. Host the image you have just created, i use imageshack.us. after it has been Successfully uploaded, copy the direct link to the image you have just created and move on to the next step. 1.Log on to your blogger dashboard 2.Click on settings, click on post and comment, and then click add button which is next to post template. A box will pop up. Copy and paste the code below in the box <img class="centered" alt="post signature" src="MY URL"> 3. Replace MY URL with your image host direct link. After adding the signature, it will not show in the previous post, but any post you published after the previous one will come along with your signature. Hope this work for you, if yes, kindly relay your comment.